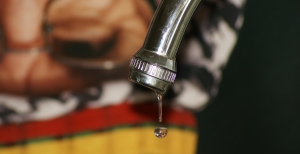
Dripping faucets are not only a nuisance, but they also waste water. On average, a faucet that drips 20 times in one minute, wasting an average of two gallons of water per day. With a few tools, you’ll be able to fix the issue (and save money!) faster than you would think. Eliminate that drip, drip, drip with the steps below.
What You’ll Need
- Phillips-head screwdriver
- Flat-head screwdriver
- Wrench
- Pliers
- Penetrating oil
- Plumber’s grease
- Replacement O-rings
Before starting the project, be sure to turn off the water with the shut-off valve that is under the sink. This will eliminate the possibility of your sink turning into a fountain. You can also plug the drain with the stopper or an old rag to prevent any parts from slipping down the drain while you work.
Find Out Where the Water is Coming From
If the water is leaking from the faucet, replacing the O-ring will typically stop the leak. To do this, simply remove the cap off of the handle to expose the O-ring and replace it. If necessary, remove the stem to expose the O-ring. If the other handle is leaking as well, repeat on the other side.
If the faucet itself is leaking, you’ll first want to figure out what type of faucet you have.
Determining What Type of Faucet You Have
Depending on the type of faucet you have, fixing a leak will require different steps.
Compression Faucet – A faucet with two handles
Ball Faucet – A faucet that contains a ball bearing
Cartridge Faucet – A faucet that has a decorative cap on the handle and feature a cartridge
Ceramic-Disk Faucet – A faucet with a ceramic Cylinder
To fix a compression faucet:
- Using your screwdriver, remove the handles
- Once the handles are removed, use your wrench to remove the nut beneath the handles
- Coat a new seat washer with plumber’s grease and replace the seat washer
- Reassemble the handle
To fix a ball faucet:
- Go to your local hardware store and purchase a ball faucet replacement kit (this will have all of the tools and parts you will need)
- Using your screwdriver, unscrew and remove the handle
- Once the handle is removed, remove the cap and collar with pliers
- Using the tools from the ball faucet replacement kit, loose and remove the faucet cam
- Remove the inlet seals and springs from the mechanism with needle-nose pliers
- Install new O-rings, springs, valve seats, and cam washers
- Reassemble the handle
To fix a cartridge faucet:
- Using your screwdriver, unscrew the handle
- Remove the retaining clip with pliers
- Coat new O-rings with plumber’s grease before removing the faucet sprout
- Once the faucet sprout is removed, replace the O-rings with the new ones you previously covered in plumber’s grease
- Reassemble the handle
To fix a ceramic-disk faucet:
- Remove the escutcheon cap from the faucet before unscrewing and removing the faucet handle
- Using your screwdriver, remove the disk cylinder to expose neoprene seals
- Remove the neoprene seals and soak them in white vinegar to loosen buildup (if the seals are frayed, thin or worn out, replace them with new ones)
- Reassemble the handle and turn on the water slowly to prevent pressure from cracking the ceramic disk
If you are not comfortable making these repairs or they don’t seem to help, give A+ Plumbing, Heating & Cooling a call today at (603) 518-5777.
